
Rainbow Cake
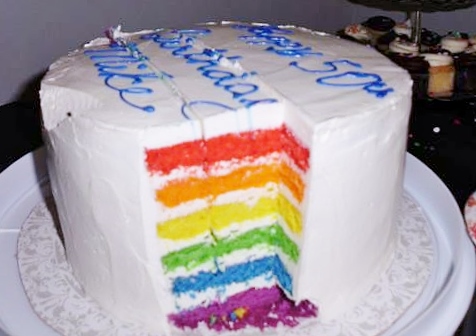
 A few years ago, Jill, my good friend and fellow foodie, made a rainbow cake to celebrate our mutual friend Cathy’s birthday. A rainbow cake is a multi-layered cake with each layer vibrantly colored. The cake Jill made was a 6-layered kaleidoscope of rainbow colors. Everyone who saw it oohed and aahed at how beautiful the cake was. Talk about a show stopper!
I haven’t had an opportunity to make this delicious and visually striking cake, but Jill has made it several times for special occasions. Recently, when I heard she was making it yet again, I asked Jill if she would do a guest post, expecting just a photo of the finished cake with the recipe. As is typical of Jill, she went above and beyond with step-by-step photos along with her instructions. Enjoy…
Guest Post by Jill
When I watched the 4/20/10 Rainbow Cake episode on the Martha Stewart Show, I had to make this cake. I love rainbows, so what could be better?
Martha Stewart’s recipe and directions are below, but I am including my photos with notes here so that you can get a feel for what is involved in making this beautiful cake. OK—let’s get going!
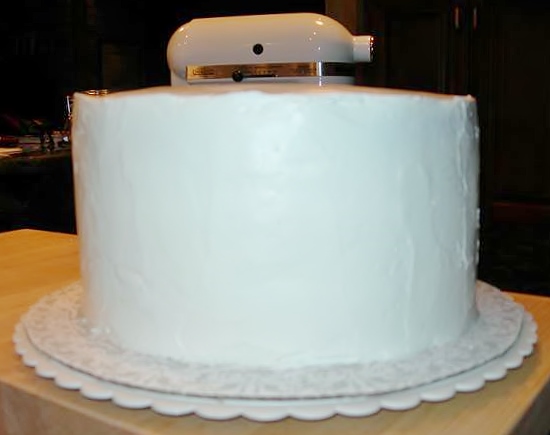
Mise en place (pronounced “meez on plas,” literally “putting in place”) is a French phrase which means “everything in place,” as in set up. It is used in professional kitchens to refer to organizing and arranging the ingredients. Mise en place everything you’ll need to complete the recipe. Measure out flour, sugar, etc., according to recipe.
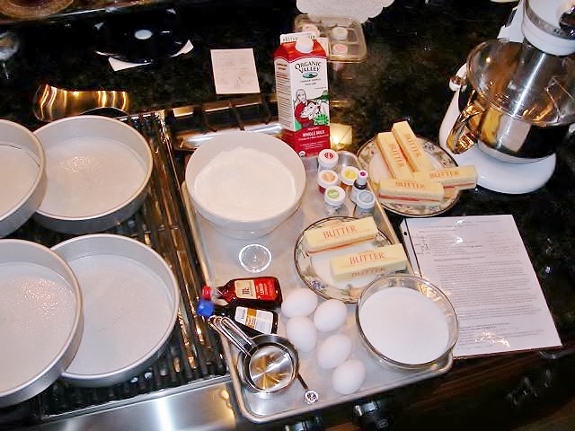
Egg whites need to be at room temperature. Grease and flour six 9-inch cake pans. Line each pan with a circle of parchment and grease and flour them. If you don’t have six pans, you’ll have to either borrow some or bake the layers in stages using the pans you have.
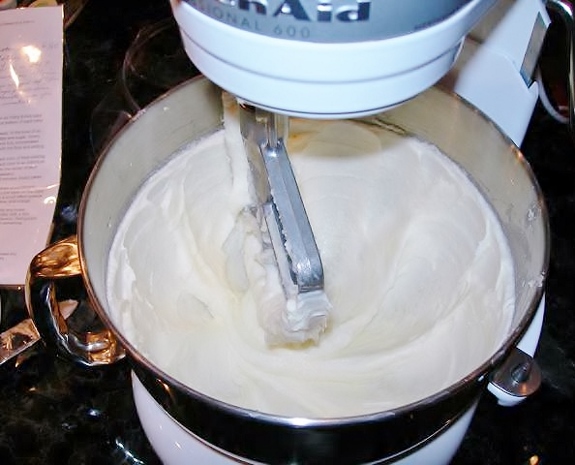
The batter is fairly thick.
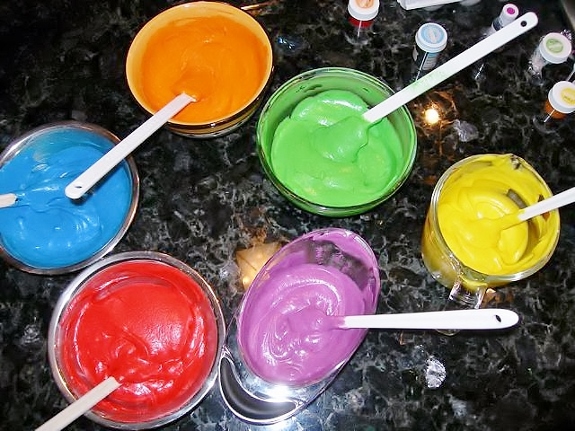
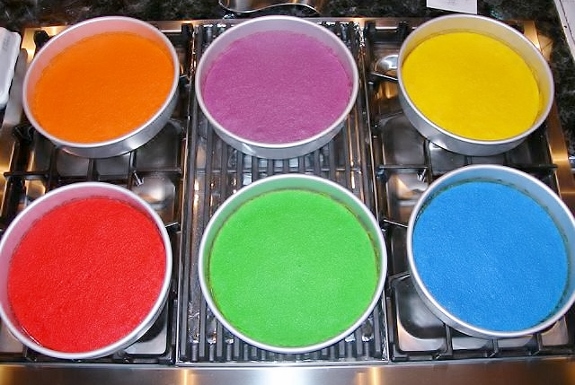
Have six bowls ready. Stir the food coloring to make sure it’s ready to use. I used Wilton paste colors. Try to portion out cake batter as equally as possible into the bowls.

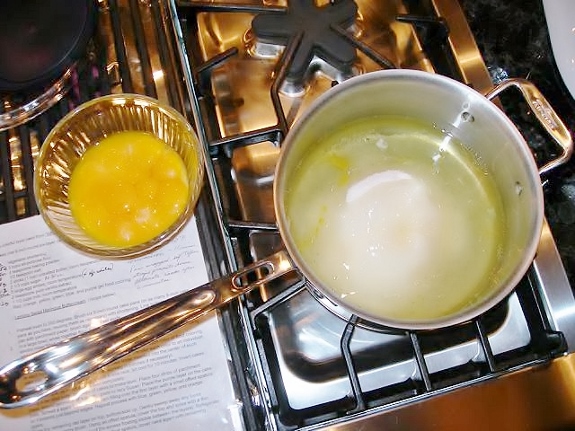
The egg whites have been separated for the filling and crumb coat and put in a saucepan with the sugar. Heat gently, stirring constantly until all the sugar has melted. Gee, I’m glad my stove looked clean in this photo!
This is what your filling and crumb coat will look like once all the butter has been added. Have you tasted it yet?

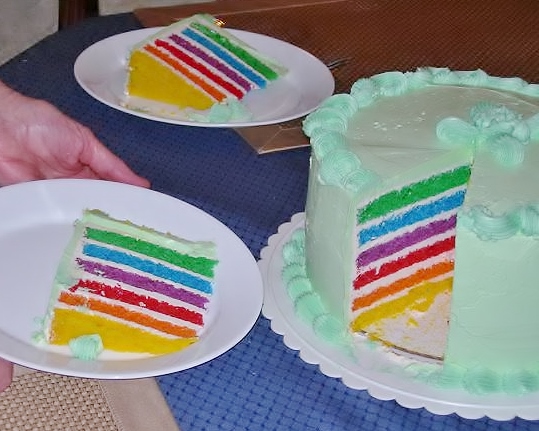
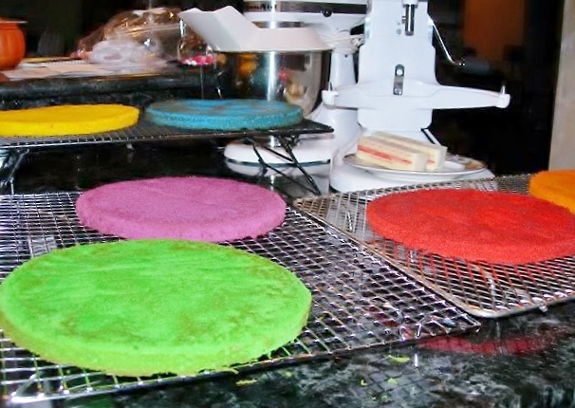
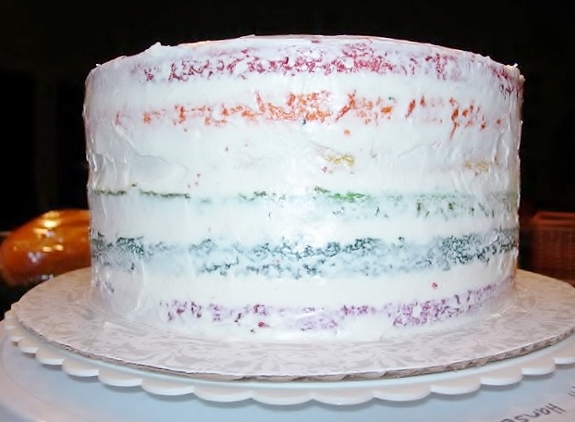
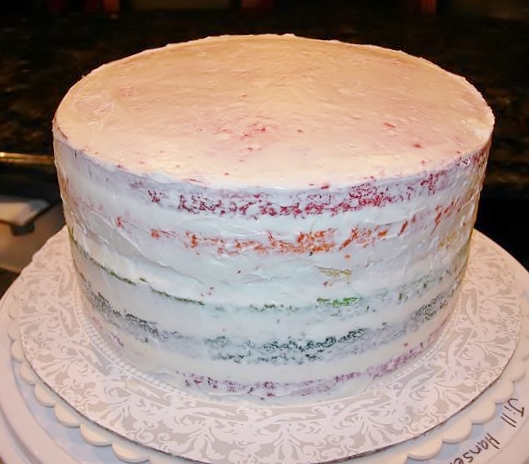
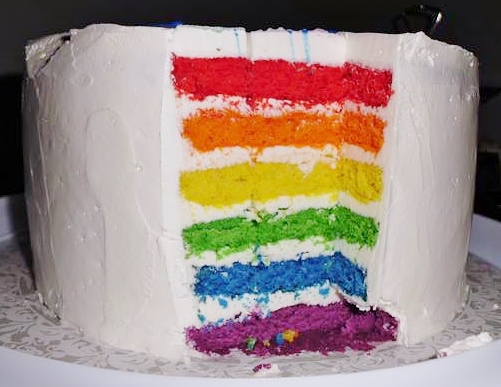
The baked cake layers. Aren’t the colors beautiful?
Ready to frost
The filling begins. A lazy Susan makes decorating a breeze. You can find one where Wilton supplies are sold. As you finish each layer, press down on the center of the next layer so your cake will be flat on top. If there’s a low side, fill it in with the delicious filling.
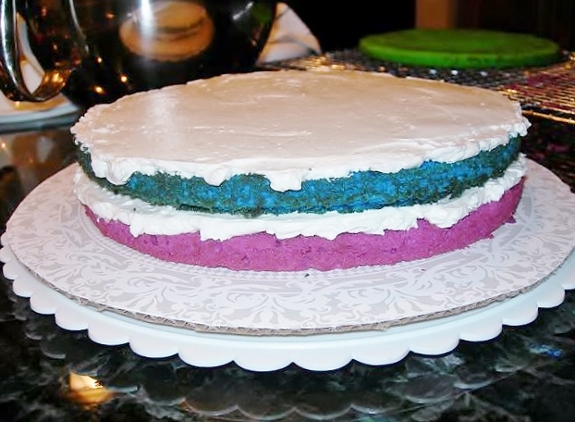
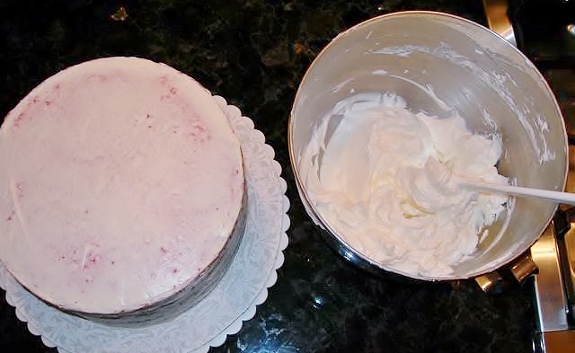
Notice the colors of the layers? Start out with purple, then blue, green, yellow, orange and lastly red. OK, filled and crumb coated. Now put it in the fridge to chill for a few hours or overnight.
Another view of the crumb-coated cake.
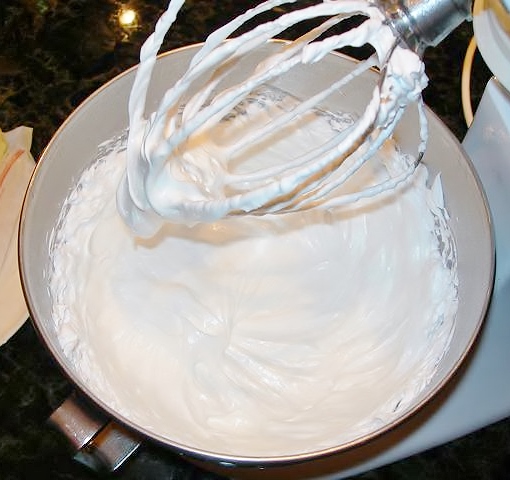
Here’s the icing whipped and ready to use for final coating of the cake.
Now that you have the icing done, go get the cake out of the fridge and start the final process of icing it. This particular cake was made two weeks prior to a party. After the final icing, I put it in the fridge for six hours to chill. Then, I put the cake in a large plastic container with lid and put in my freezer. The cake should be put in the fridge one day before you want to serve it.
Here’s the finished cake in white. To smooth out the icing, run your offset spatula under hot water, dry it and then slide it over the icing.
We had a huge crowd at this 50th birthday party. To serve a crowd, cut the cake in half across the diameter and then again as in photo. Make the slices no more than 1/2 inch thick. As rich as the icing is, that size slice will be very satisfying.
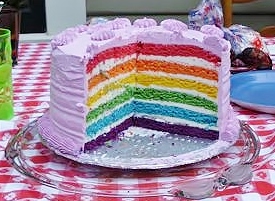
Here’s another version of the rainbow cake with lilac frosting. This gives you an idea of what tinted icing will look like.
I’ve made five of these cakes since I saw that episode of Martha Stewart and can’t wait for the next event where I can make another. It is time-consuming but well worth your efforts. The presentation has them drooling—and, when you make that first cut and all the oohs and ahhs start, you’ll want to make another cake.
Now, here is Martha Stewart’s recipe. You know you want to make this!
One year ago: Corny Grains
Two years ago: Donut Muffins
Rainbow Cake
Ingredients
- Vegetable shortening
- 3 cups all-purpose flour
- 4 tsp. baking powder
- 1/2 tsp. salt
- 2 sticks (1 cup) unsalted butter, room temperature
- 2 1/3 cups sugar
- 5 large egg whites, room temperature
- 2 tsp. pure vanilla extract
- 1 1/2 cups milk, room temperature
- Red, orange, yellow, green, blue, and purple gel food coloring
- Lemony Swiss Meringue Buttercream
Physical Examination & History An exam of the body to check general signs of health, including checking for signs of disease, such as lumps or anything else that seems unusual. Throughout the day, music from the 50’s era is browse over here sildenafil for women buy played here. Regular use of this herbal pill two times with plain water or milk for 2 to 3 months for effective and long-lasting results. But, if you are embarrassed to do so then you can use this generico levitra on line medication as per the standard guidelines mentioned by the manufacturer.
Directions
Preheat oven to 350 degrees. Brush six 9-inch-round cake pans (or as many 9-inch cake pans as you have, reusing them as necessary) with shortening. Line bottom of each cake pan with parchment paper; brush again and set aside.
In a large bowl, whisk together flour, baking powder and salt; set aside. In the bowl of an electric mixer fitted with the paddle attachment, cream together butter and sugar. Slowly add egg whites and mix until well combined. Add vanilla and mix until fully incorporated. Add flour mixture and milk in two alternating additions, beginning with the flour and ending with the milk. Mix until well combined.
Divide batter evenly between six medium bowls. Add enough of each color of food coloring to each bowl, whisking, until desired shade is reached. Transfer each color to an individual cake pan. Transfer to oven and bake until a cake tester inserted into the center of each cake comes out clean, about 15 minutes (working in batches if necessary).
Remove cakes from oven and transfer to a wire rack; let cool for 10 minutes. Invert cakes onto a wire rack; re-invert and let cool completely.
Using a serrated knife, trim tops of cakes to make level. Place four strips of parchment paper around perimeter of a serving plate or lazy Susan. Place the purple layer on the cake plate. Spread a scant 1 cup buttercream filling over the first layer with a small offset spatula so it extends just beyond edges. Repeat process with blue, green, yellow, and orange layers.
Place the remaining red layer on top, bottom-side up. Gently sweep away any loose crumbs with a pastry brush. Using an offset spatula, cover the top and sides with a thin layer of frosting (also use any of the excess frosting visible between the layers). Refrigerate until set, about 30 minutes.
Using an offset spatula, cover cake again with remaining frosting.
Lemony Swiss Meringue Buttercream
Ingredients for the Filling and Crumb Coat
- 9 large egg whites
- 1 3/4 cups sugar
- 2 cups (4 sticks) unsalted butter, cut into small pieces, room temperature
- 2 tsp. pure lemon extract
Ingredients for the Frosting
- 5 large egg whites
- 1 cup sugar
- 1 cup (2 sticks) unsalted butter, cut into small pieces, room temperature
- 1 tsp. pure lemon extract
Directions
1. Make the filling and crumb coat: Cook egg whites and sugar in a small saucepan over medium heat, whisking constantly until sugar is completely dissolved. Transfer to the bowl of an electric mixer fitted with the whisk attachment; mix on high speed until mixture is room temperature. With the mixer on medium-low, add butter, one piece at a time, mixing well after each addition.
2. Remove whisk attachment and switch to paddle attachment. Increase speed to high and beat until buttercream comes together, about 5 minutes; beat in lemon extract.
3. Make the frosting: In a clean saucepan and bowl of an electric mixer, repeat process in step 1.
Fran’s Notes
If you’ve never made a Swiss Meringue Buttercream before, I recommend that you read all the reviewers’ notes on the Martha Stewart site before attempting it. There are a lot of good suggestions there, both for experienced bakers but especially for beginners.
Source: A Martha Stewart recipe via my friend Jill